Manage Process with Workflow
We are proud to present you our new workflow system. As you can use the workflow in Suggestion and Kaizen, you can now use the workflow for Education. Thanks to flow, you can design your simple and complex processes with interconnected flows.We are proud to present you our new workflow system. As you can use the workflow in Suggestion and Kaizen, you can now use the workflow for Education. Thanks to flow, you can design your simple and complex processes with interconnected flows.
Note
Only the Admin user is authorized to create a workflow
Designing a workflow
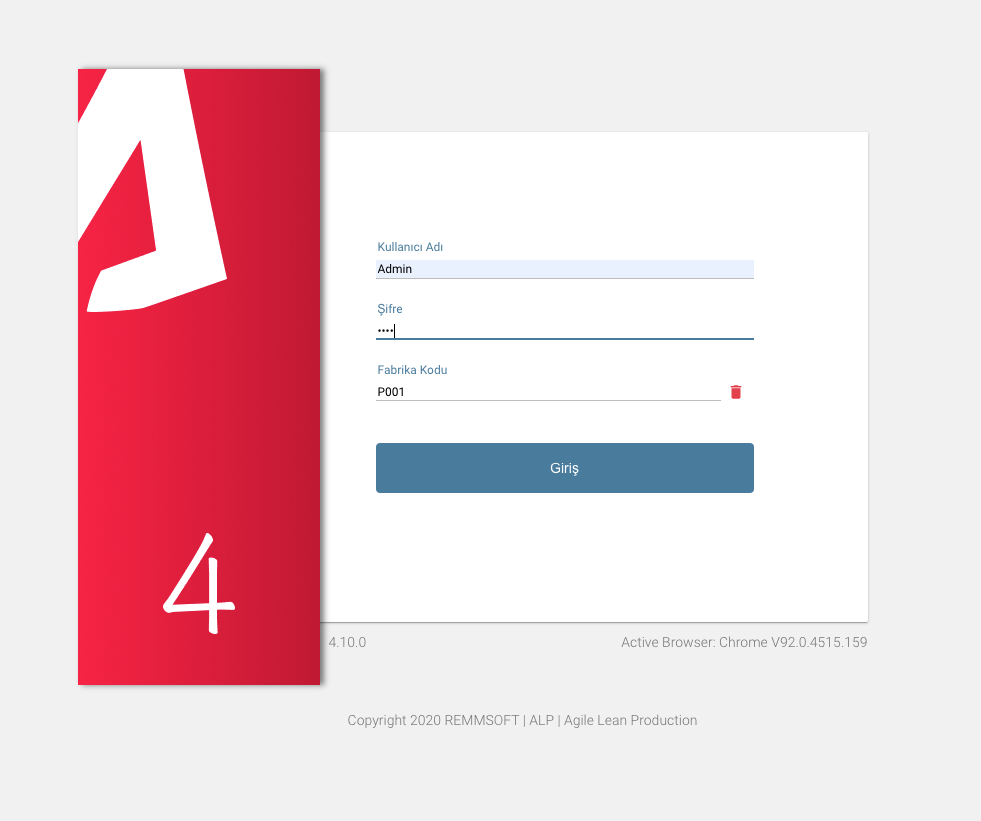
You can log in to the ALP application with your Admin user name and password.
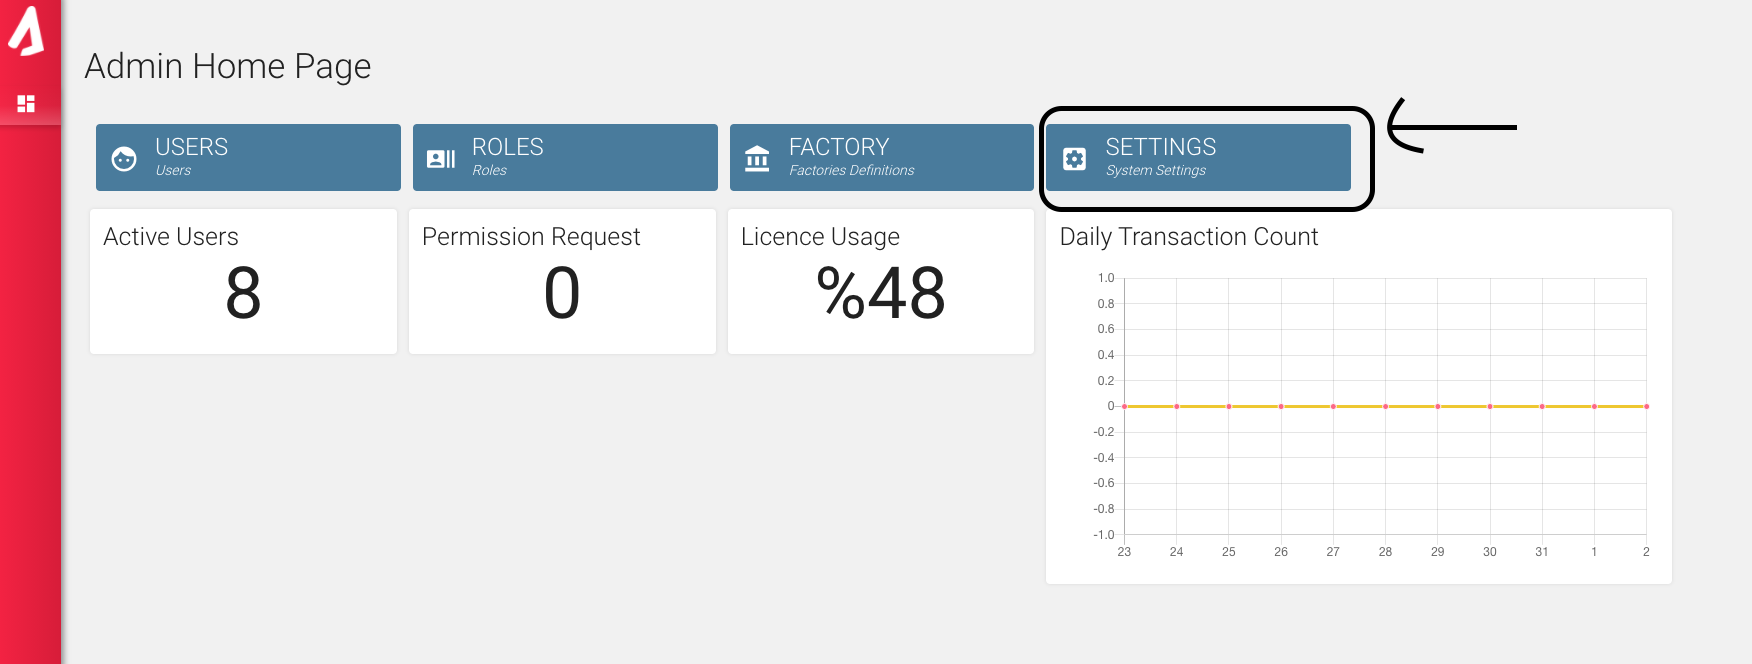
Home -> Settings -> Workflow -> Add


Before creating a new record, the code and name rule must be entered. Then, Tag steps are created automatically. You cannot delete these steps in the workflow


These steps describe the situations in your workflow. When adding a workflow step, you must select the status of your relevant workflow step in the ‘Status’ field. Thus, you can see the status of the workflow step you are in as the workflow progresses.
Designing a workflow
You can open the Workflow step tab by pressing (+) on the Workflow Definitions screen.

There are 4 different workflow step types:
- Tag
- Decision
- User Consent
- User Information
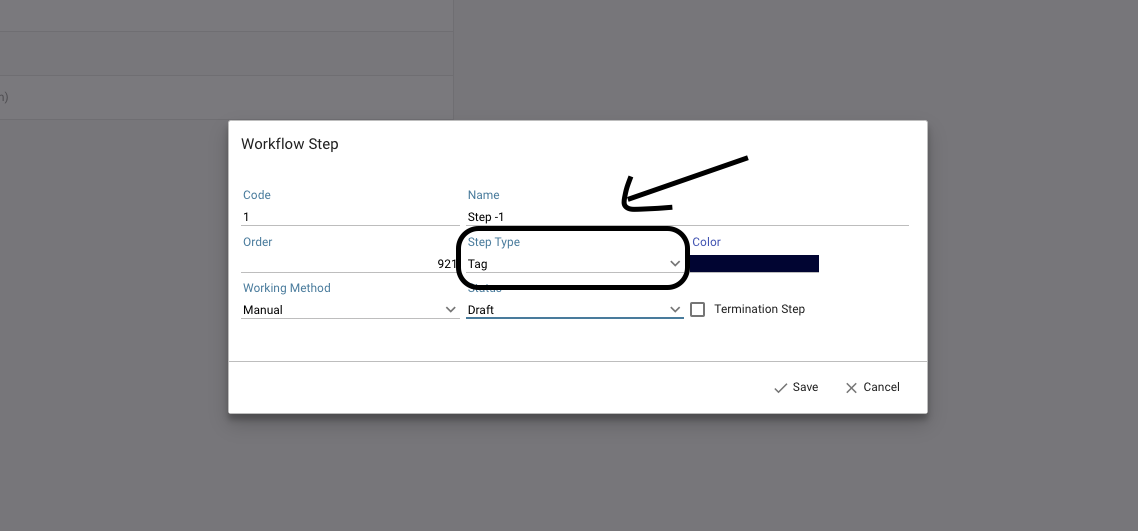
Tag
Only definitions are entered. Suggested Operation Mode is selected as ‘Manual’. Manual steps do not progress automatically, users have to trigger the workflow manually.
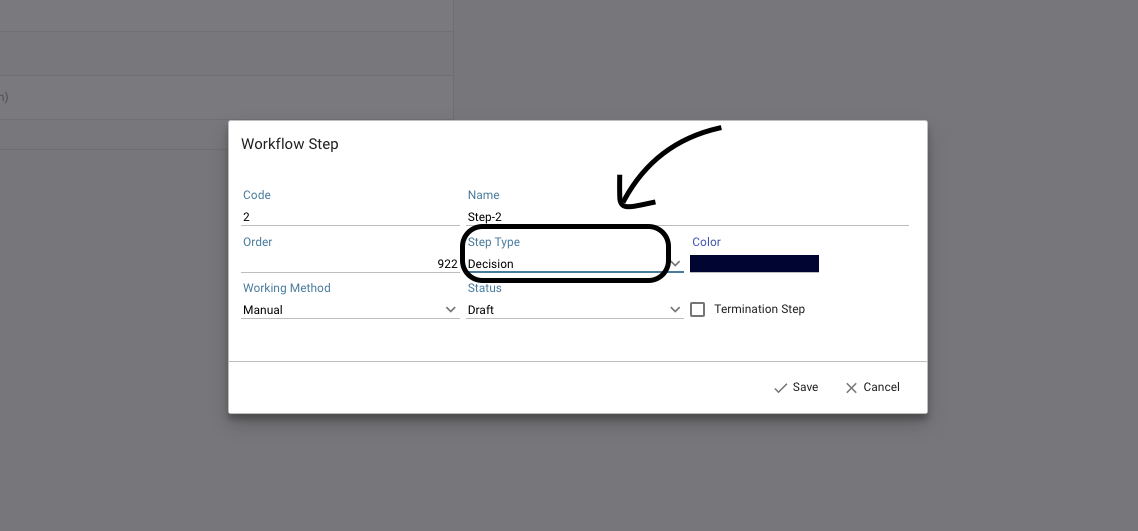
Decision
In this step, you can set a rule for the workflow to pass to the next step. The workflow continues the process by going to different steps within the rule you set.
Recommended Mode of Operation: It should be selected automatically. When selected automatically, the workflow advances to the next specified step without any triggering.
The entries are completed and the ‘Save’ button is clicked. When the decision step is clicked on the flow chart, the detail screen opens on the right side of the screen. Detailed information of the rule flow can be entered by pressing the (+) button on the detail screen.
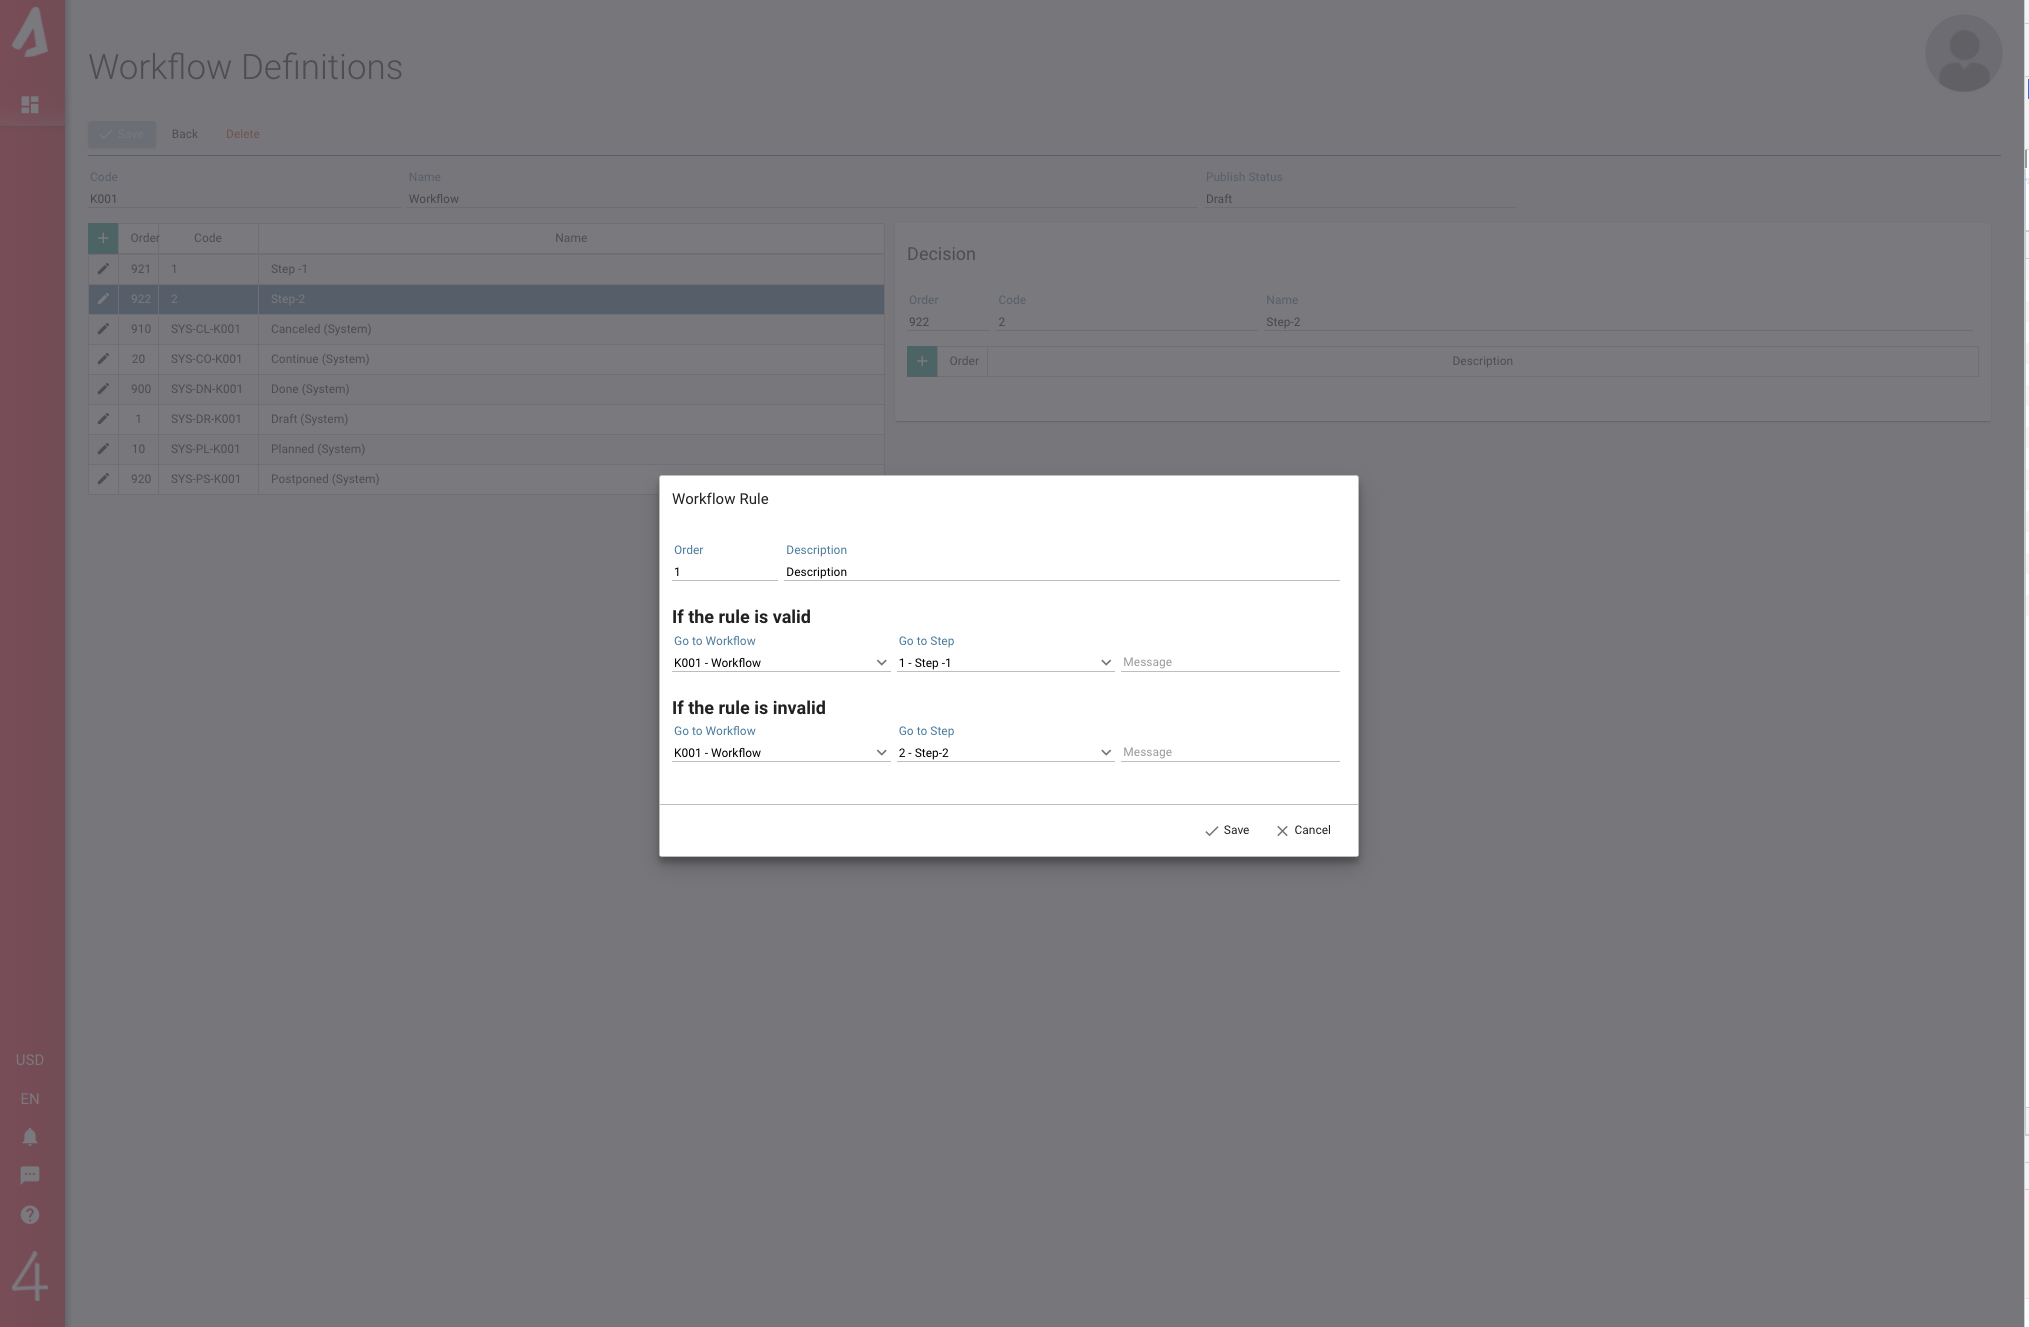
If the rule is valid / the rule is invalid, you can determine which stream and which step to follow from this screen.
After this screen is saved, the And/Or screen appears.
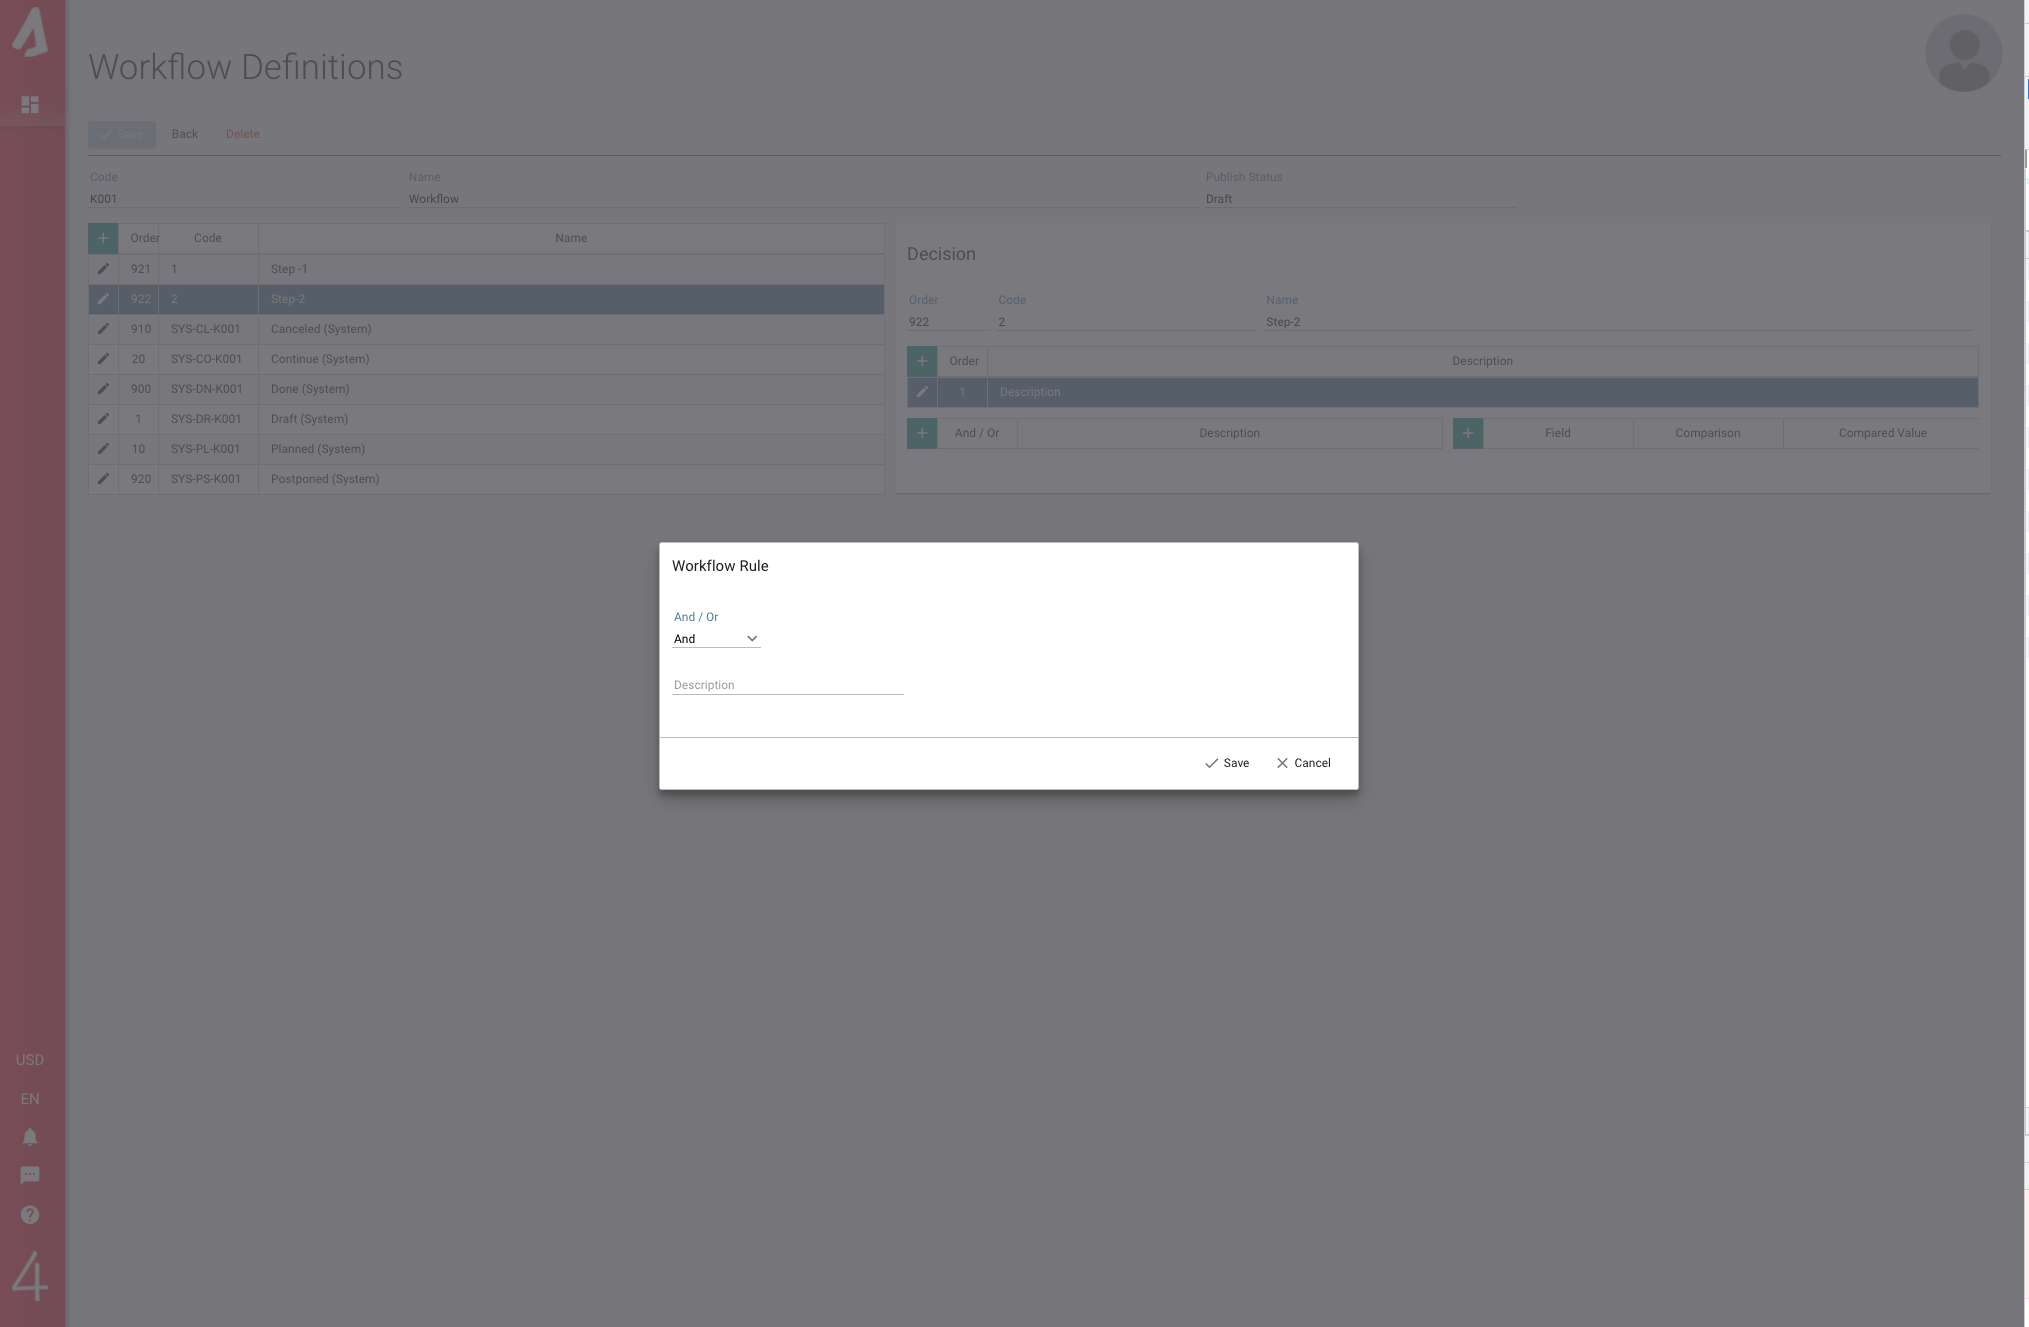
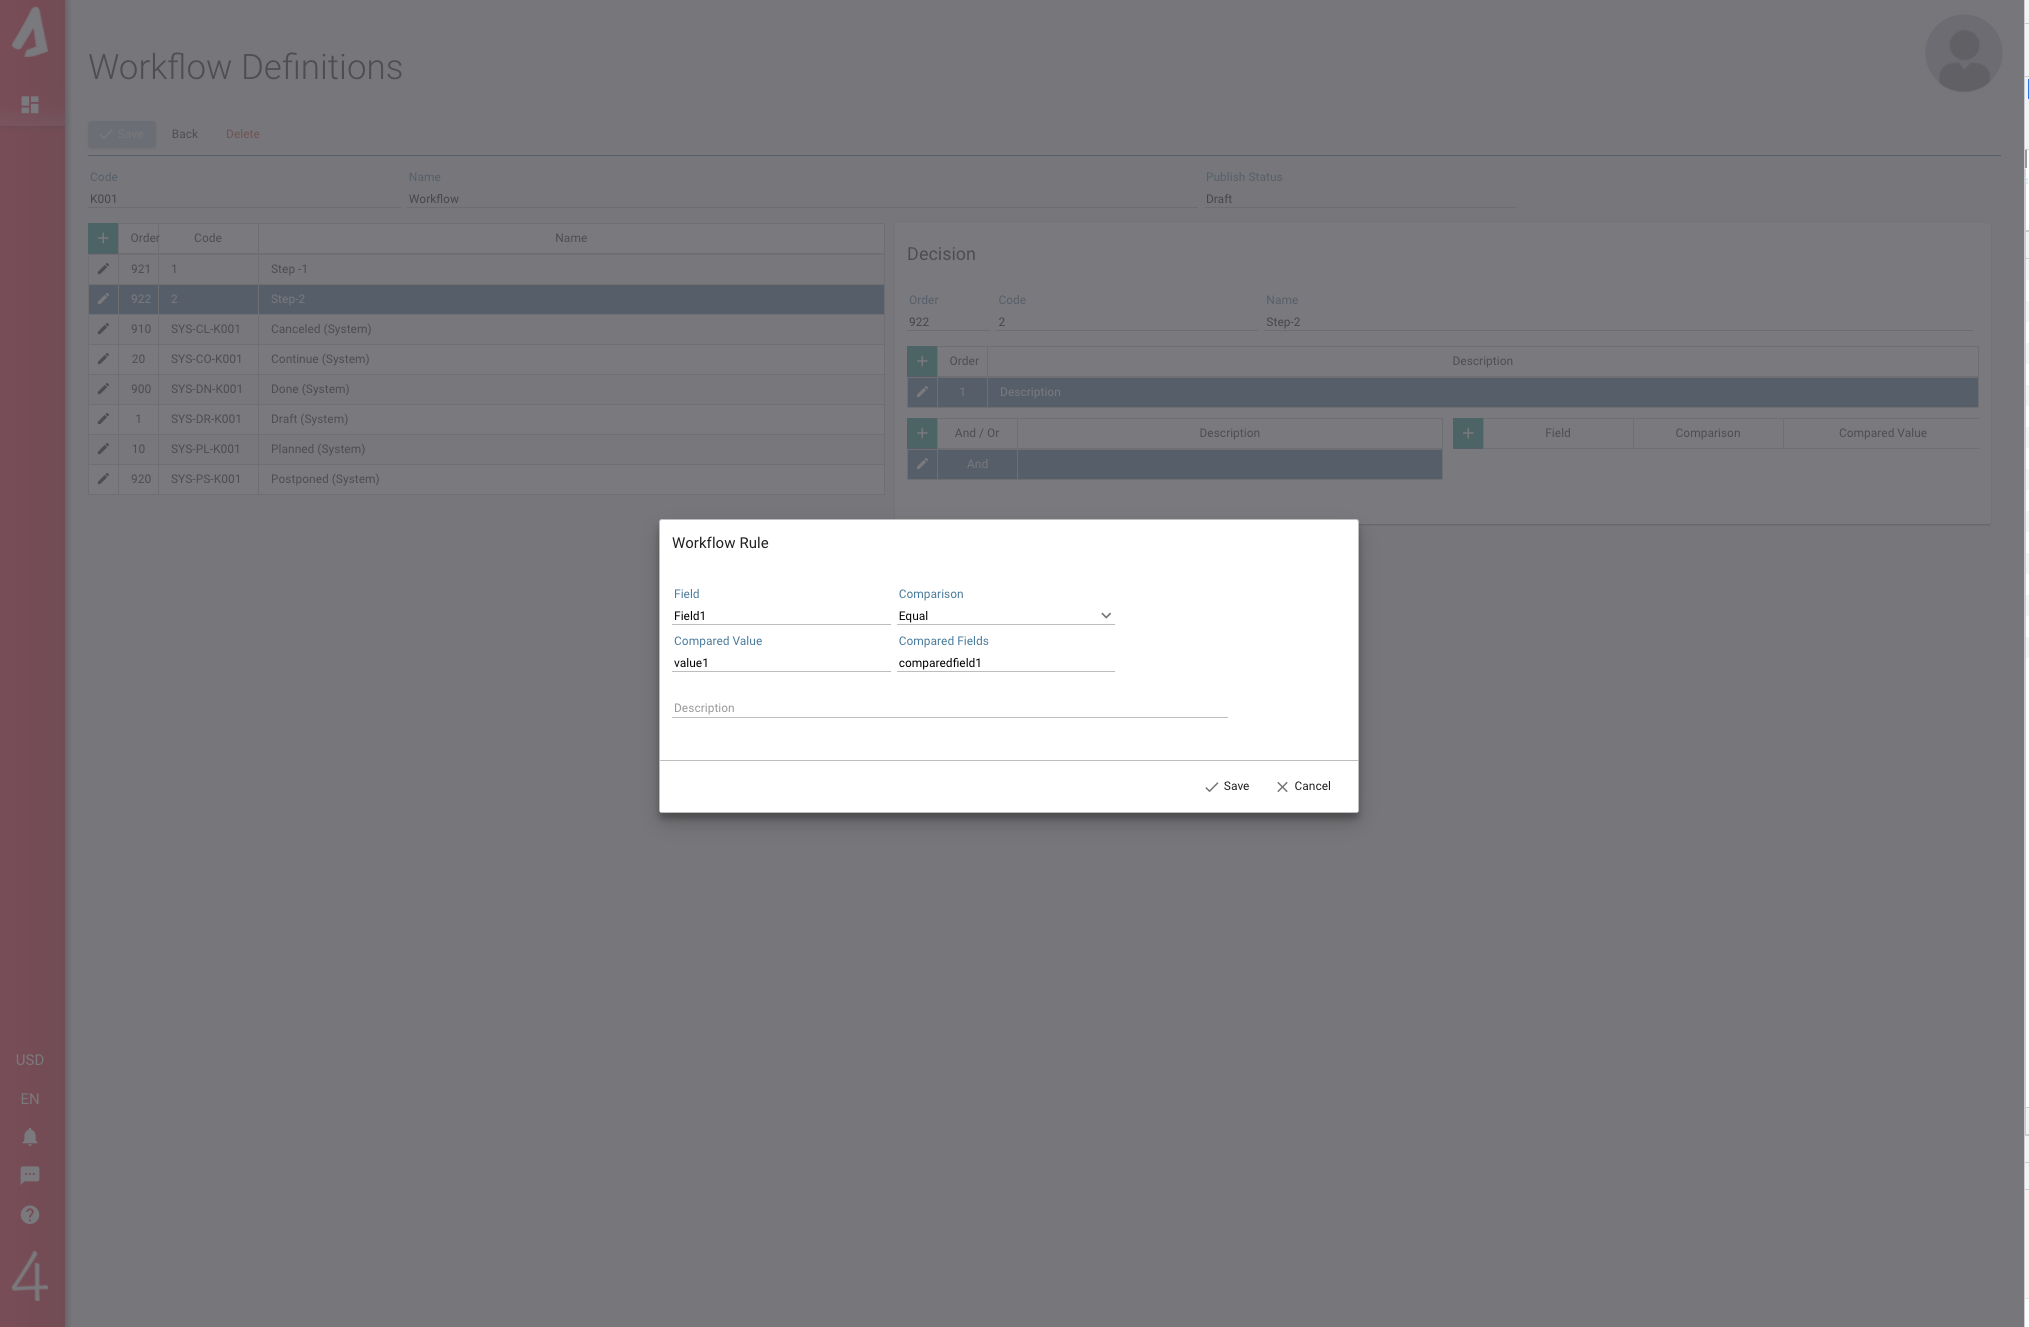
When this screen is saved, the Workflow Rule screen opens.
On this screen, what the rule will be is written under the ‘Field’ heading. The comparison of the specified rule is selected under ‘Comparison’. The ‘Compared Value’ determines what the rule will be compared to.
User Consent
This step is used when a user’s approval is needed for the progress of the process. Notifications are sent to the relevant persons via e-mail and to the ALP account, allowing the person to Approve/Reject.
Recommended Mode of Operation: It should be selected automatically. In case of Approval/Rejection, the user proceeds to the next step without the need for someone else to manually trigger the workflow.
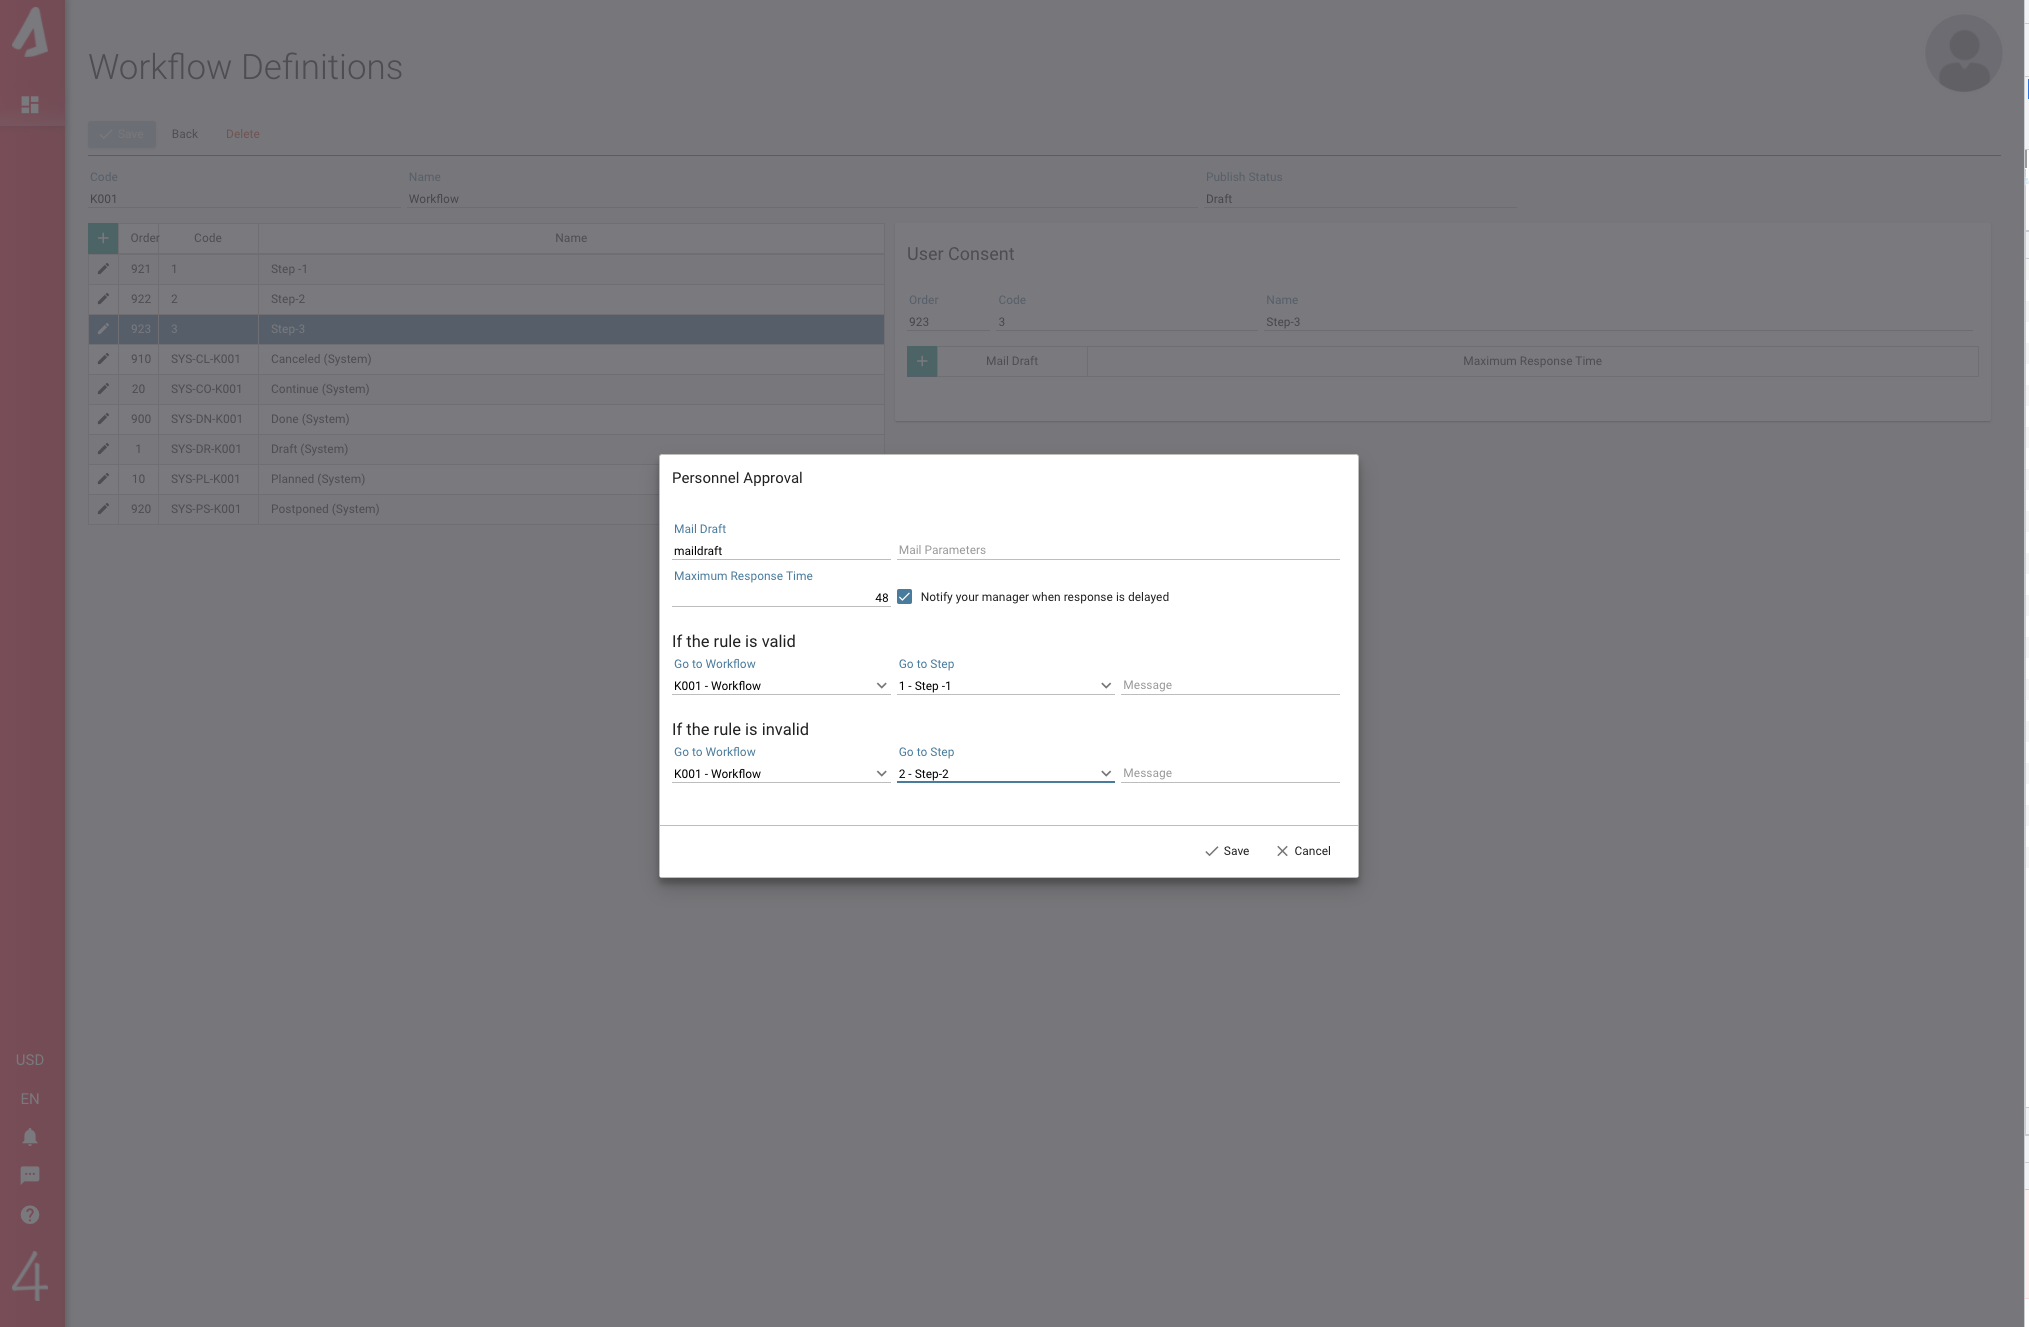
The detail screen of the User Approval step opens on the right side of the screen. To create a draft mail, the (+) button is pressed on this screen. The Personnel Approval screen opens. On this screen, Mail Draft, Mail Parameters and Maximum Response Time information are entered. In addition, if the Rule is Valid / The Rule is Invalid, the steps are determined.
After this screen is saved, the ‘Mandatory Approval’ window opens on the ‘User Approval’ detail screen on the right and when the (+) button is pressed, the screen opens.
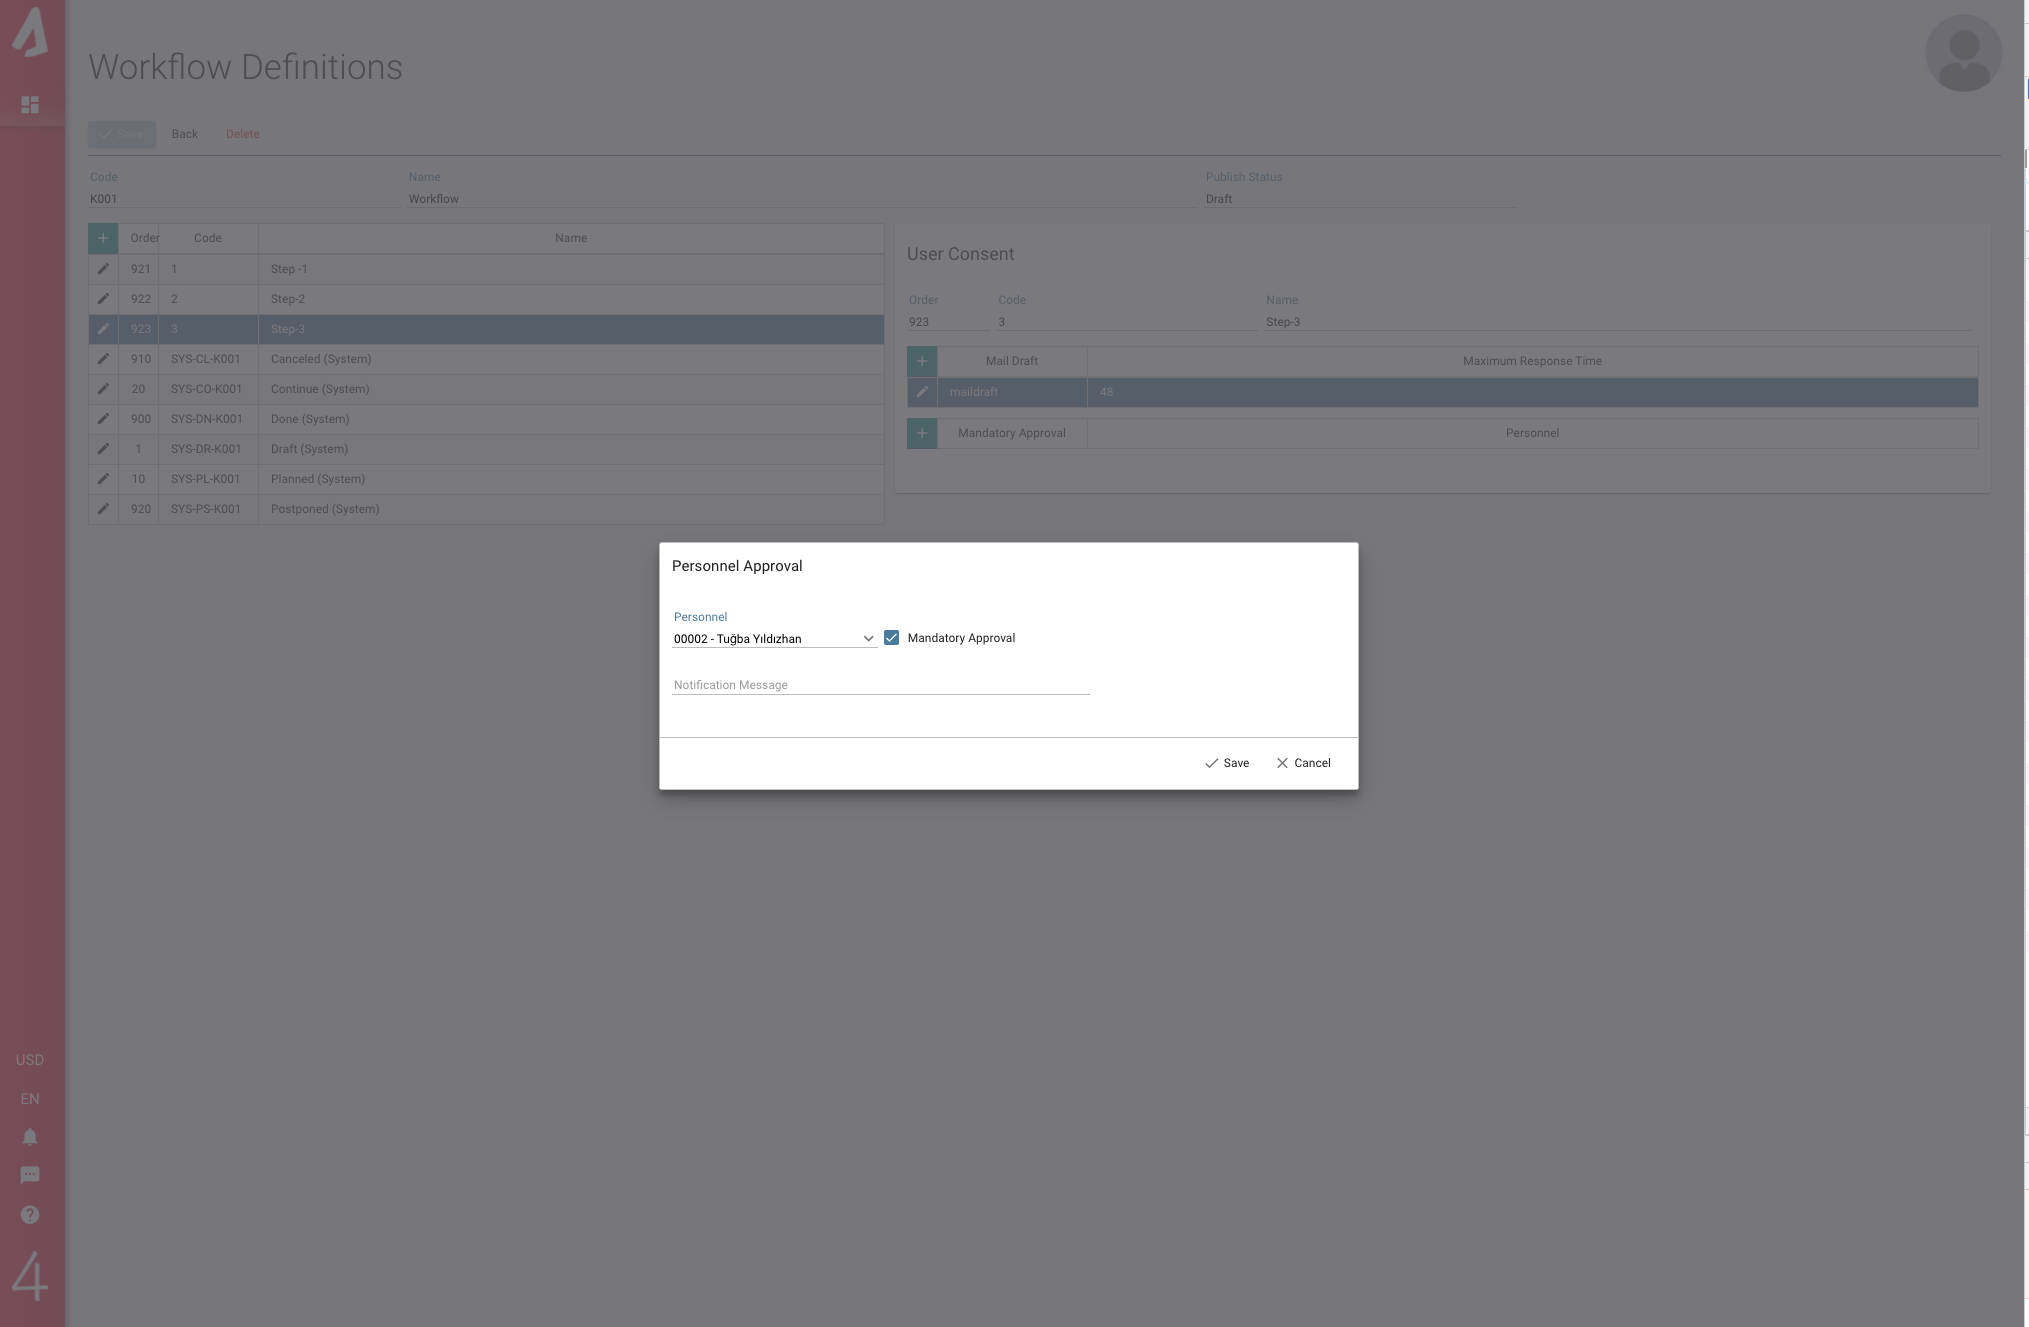
On this screen, you can enter the name and notification message of the personnel whose approval you want to receive. You can determine whether the employee’s approval is mandatory to pass this step by clicking on the “Mandatory Approval” field.
User Information
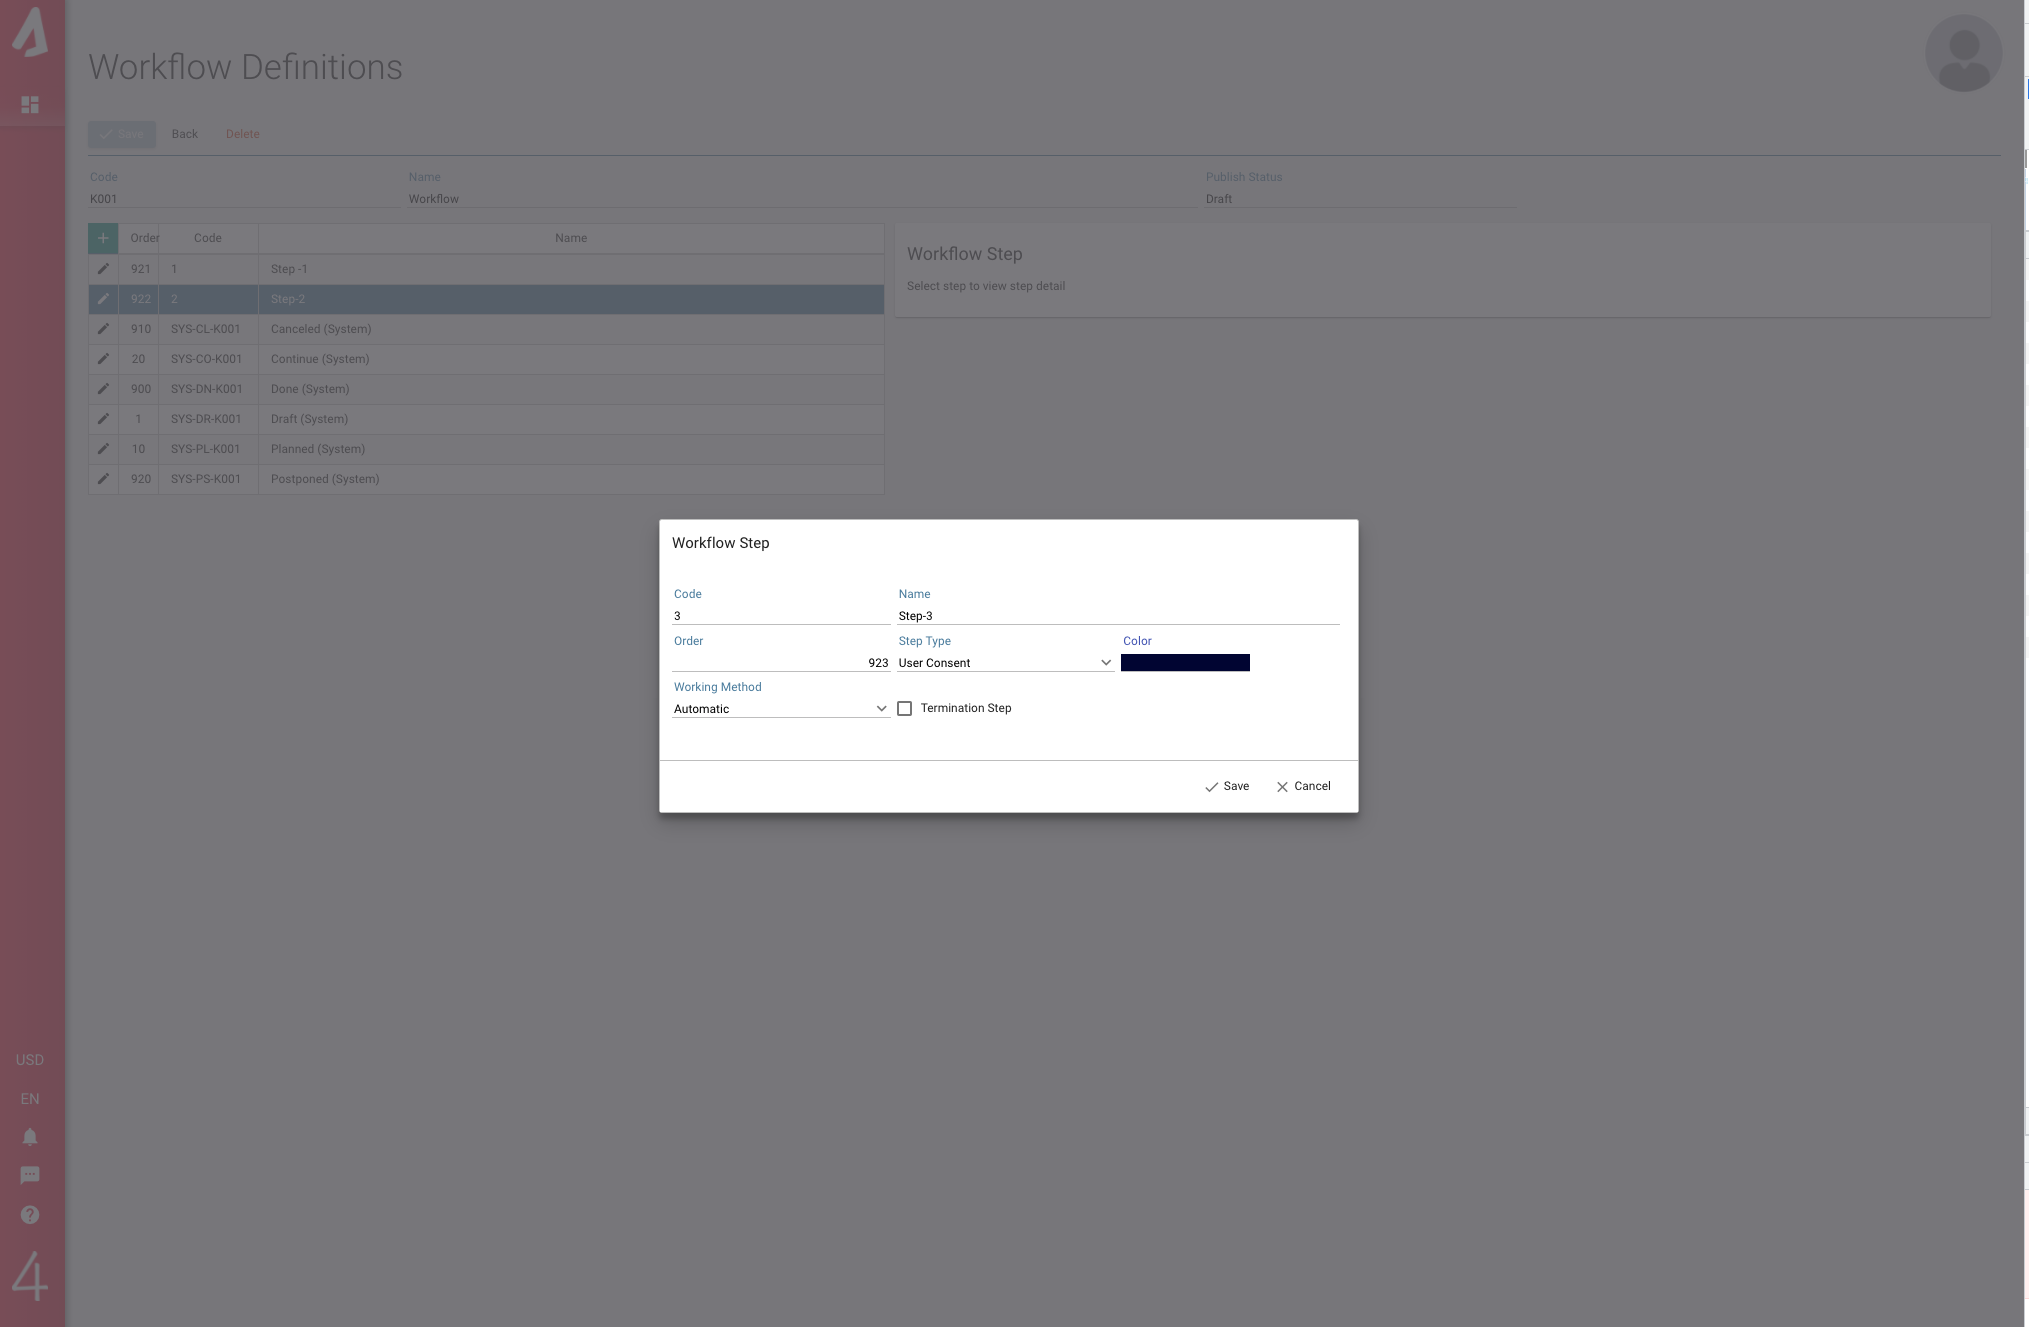
You can use this step if you want to inform any personnel. Click the Add (+) button and enter the relevant definitions on the screen, select the step type as “User Information”. ‘Operating Method’ is selected as “Automatic” and saved.
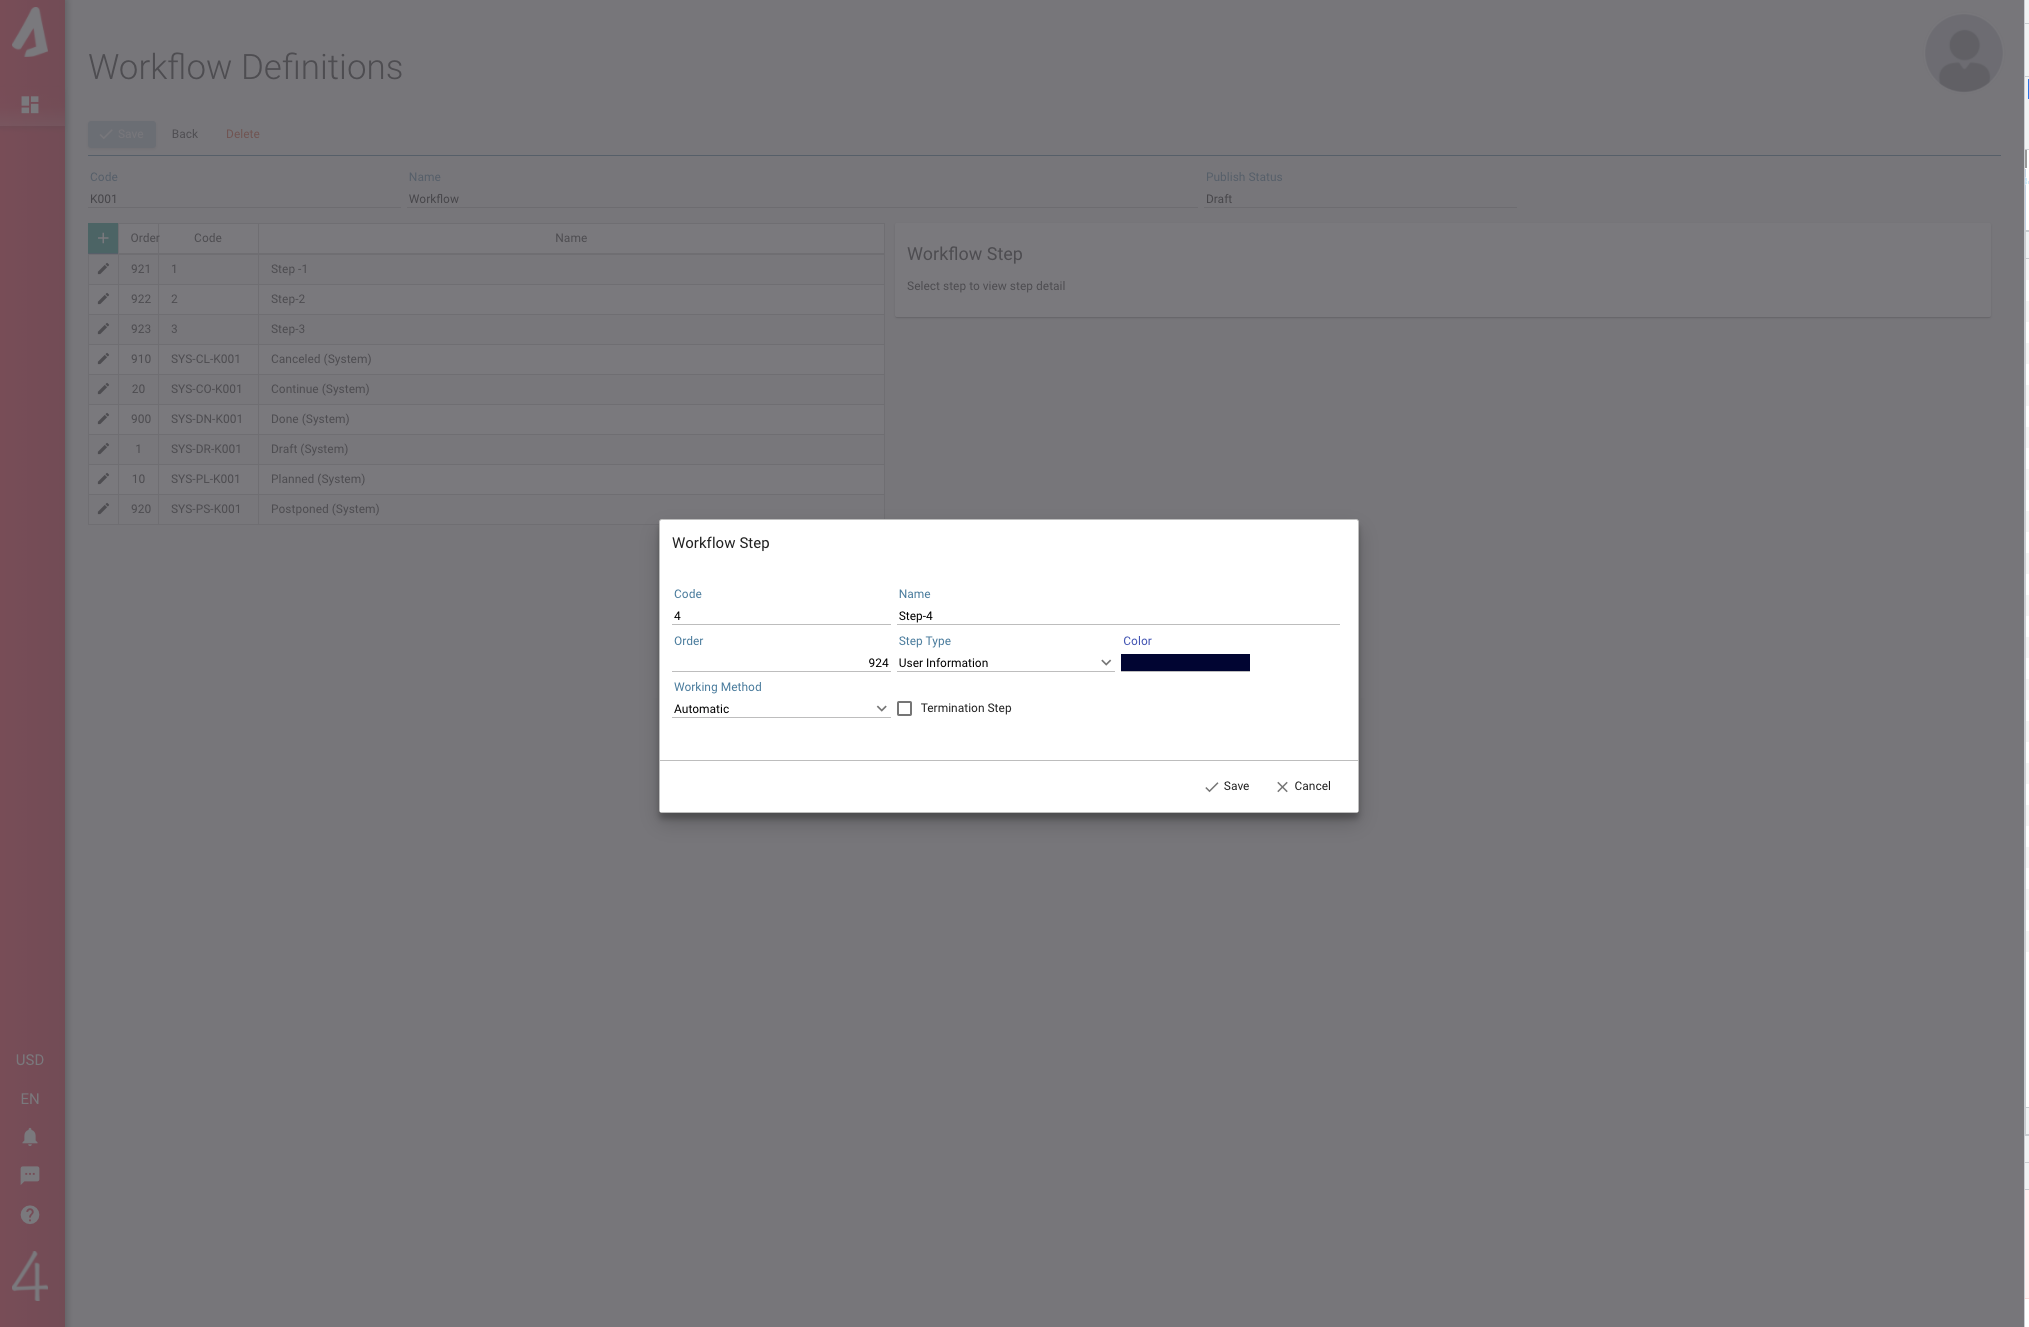
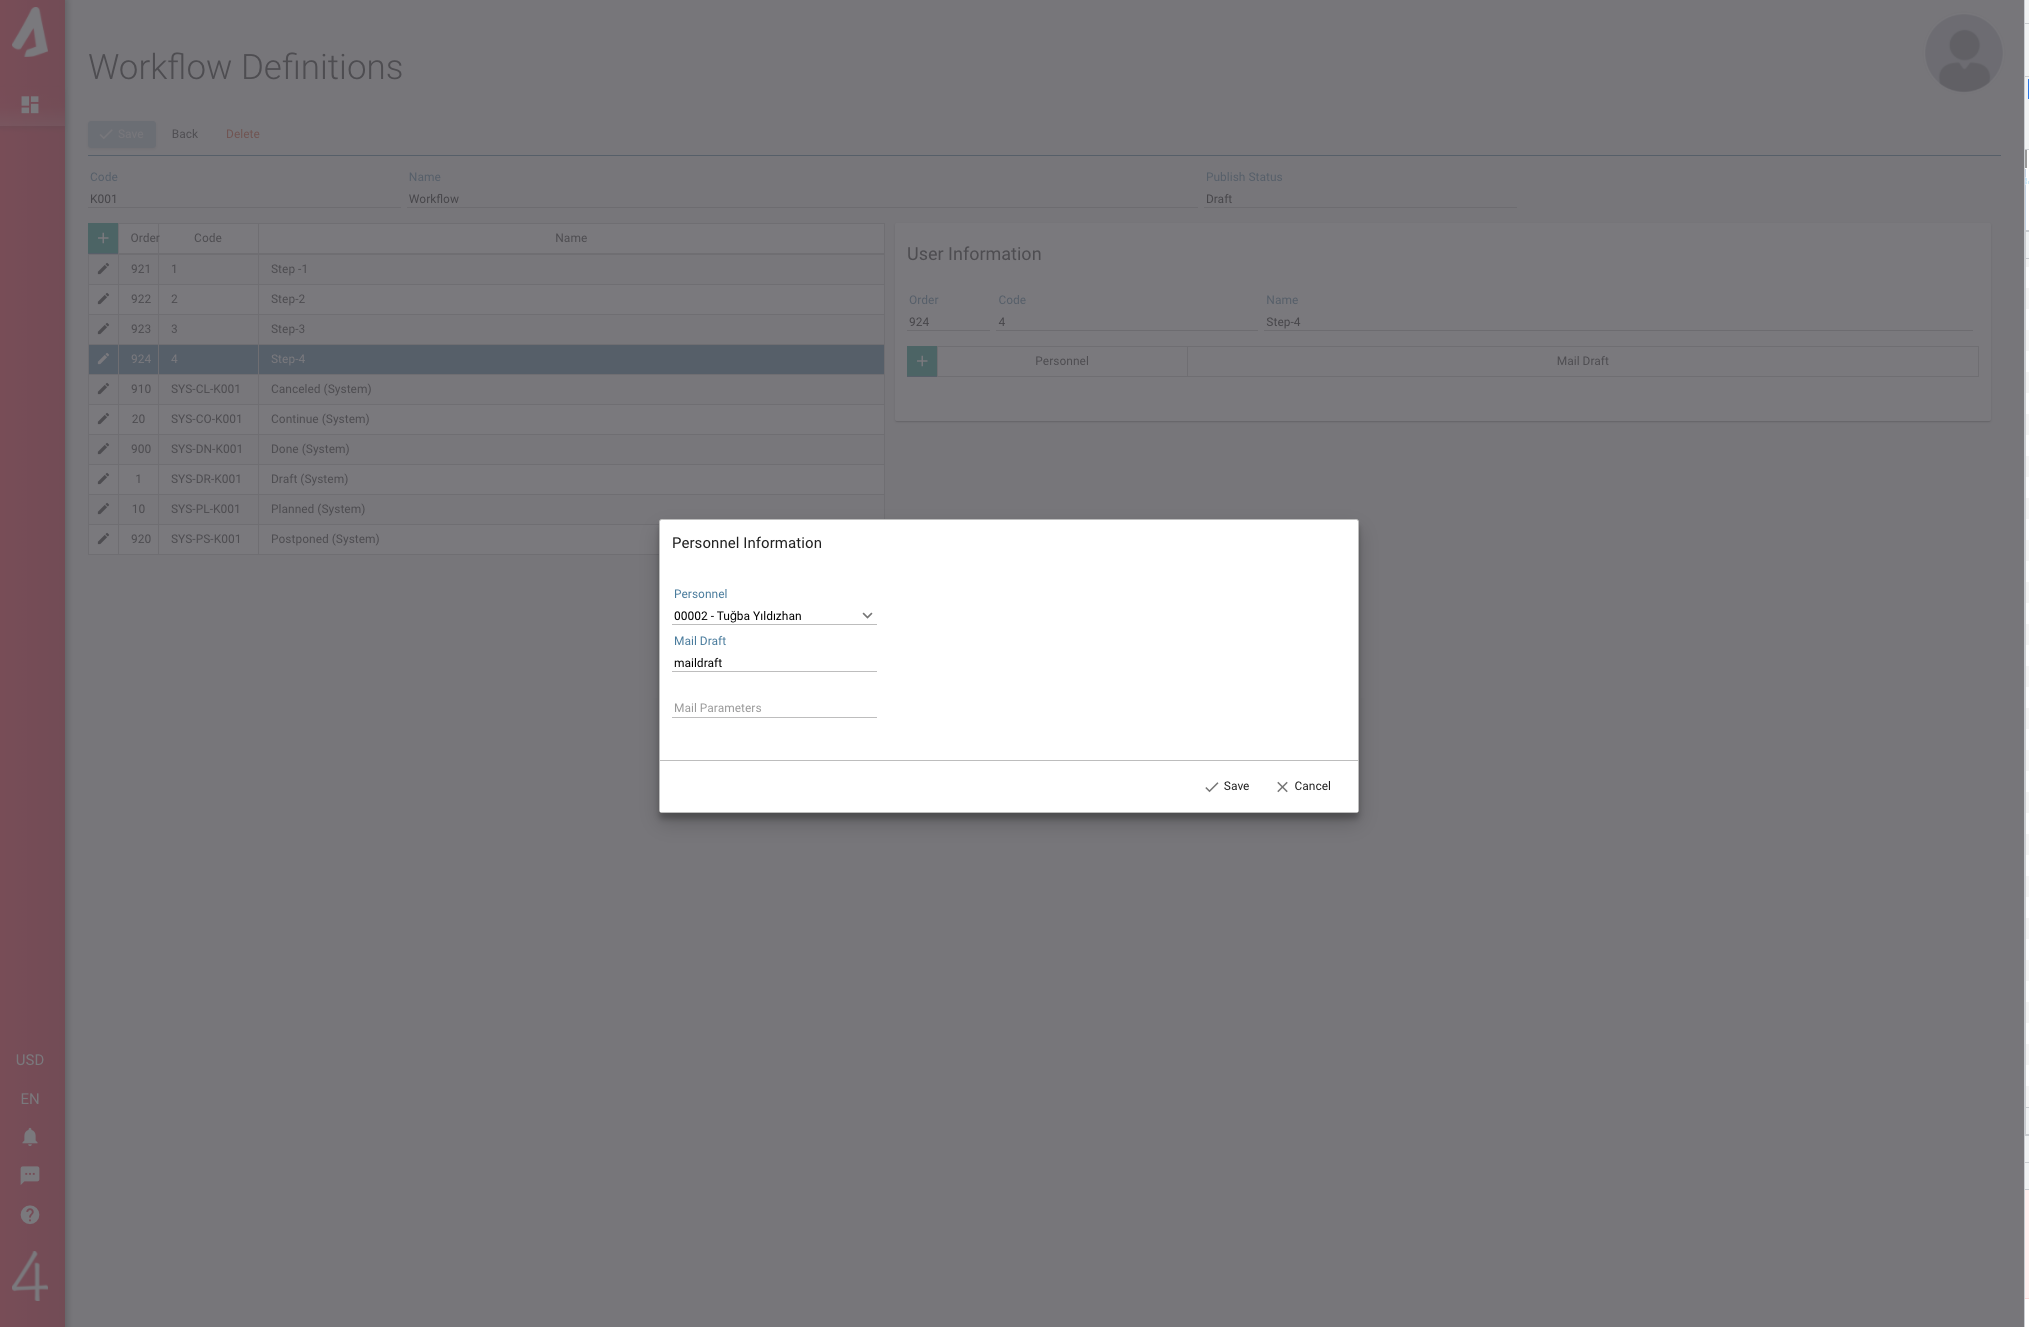
The ‘User Information’ detail screen opens on the right side of the screen. By pressing the (+) button, you can enter the personnel you want to inform, the e-mail draft to be sent and the e-mail parameters from this screen.
Finalization Step
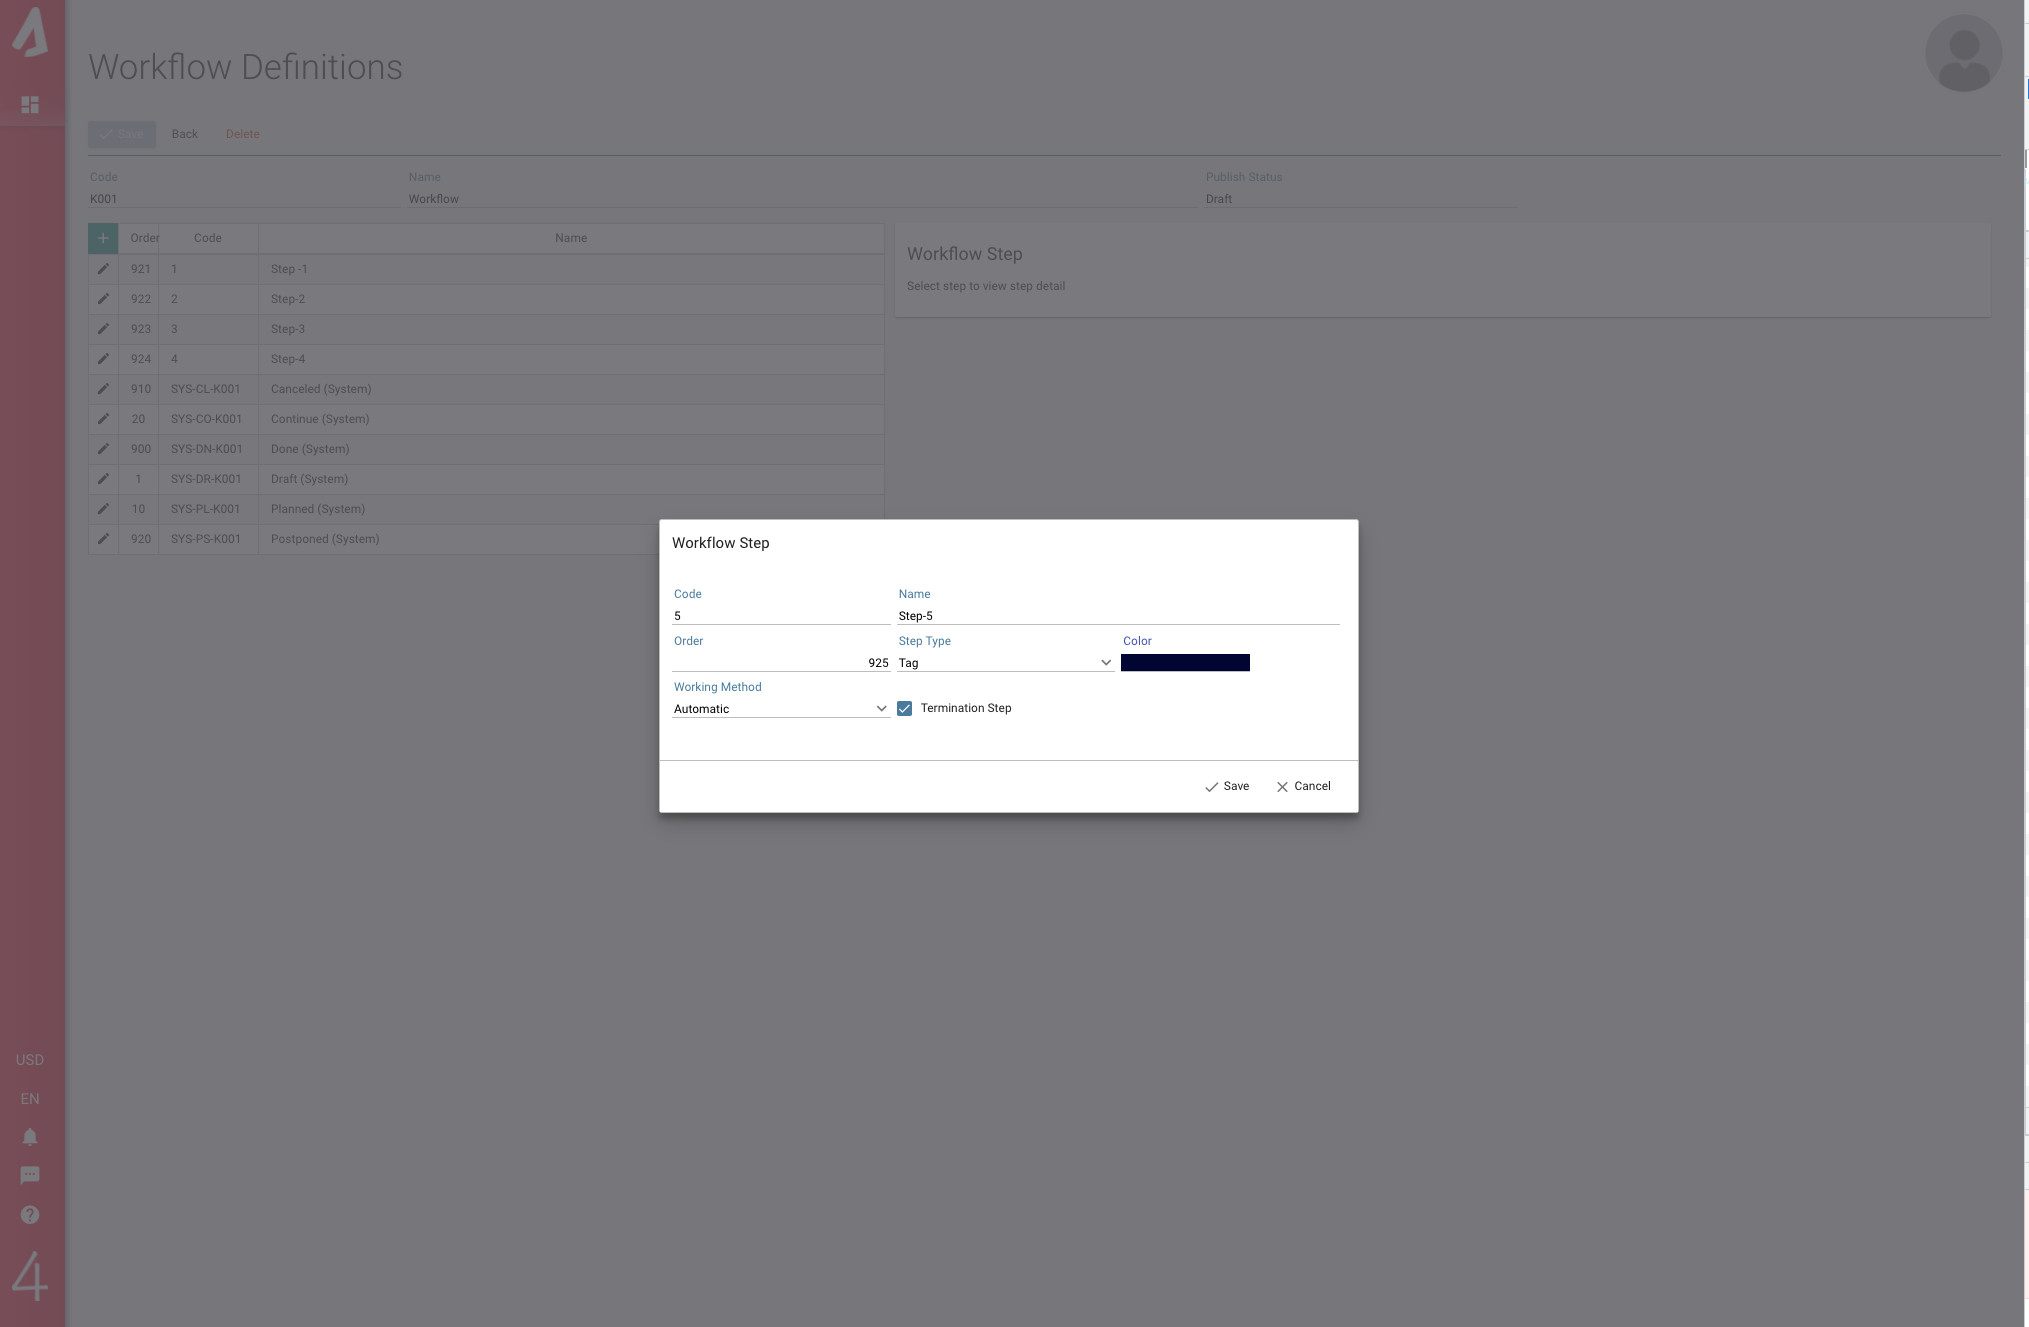
This step is the last step of the workflow. Finishing steps should be added to the bottom of the workflow step list. (More than one finishing step can be created.) The finishing step is created by clicking the “Finishing Step” box on the ‘Workflow Step’ card.
After all these steps are completed, your workflow is ready to work.
💡 Tip: Now let’s take a look at how the workflow works when using ALP.
After entering and save the Kaizen / Training / Suggestion, the relevant workflow is activated.
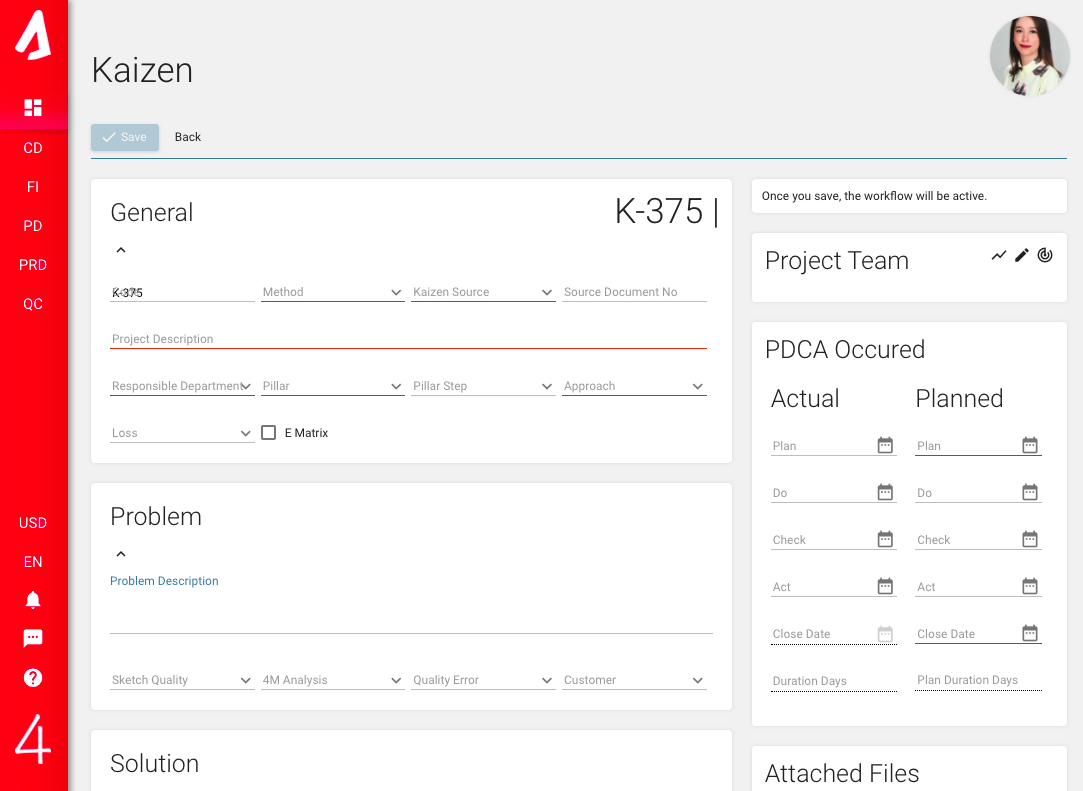
If Operating Method is selected Manual in the first step of your workflow, you must trigger the workflow manually. For this, you trigger the workflow to go to the next step by pressing the Red button on the relevant Kaizen / Training / Suggestion detail screen.
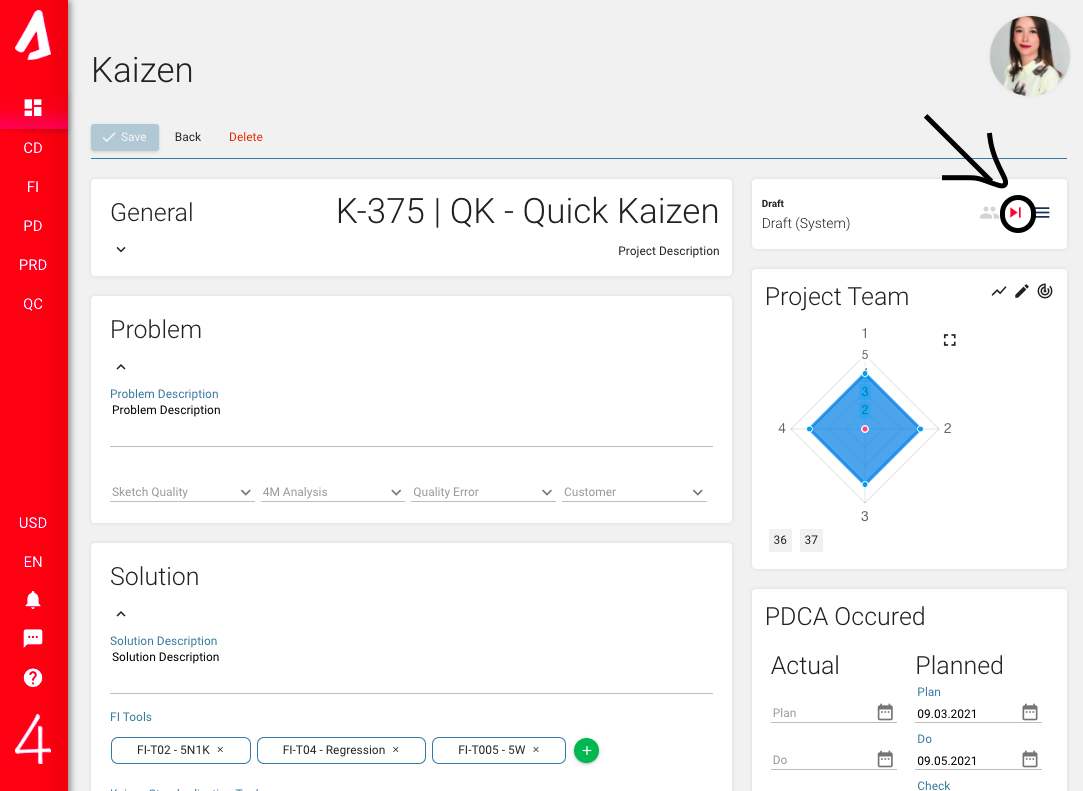
When the workflow comes to the user approval step click the human icon , you can see who is notified for approval and the approval status.

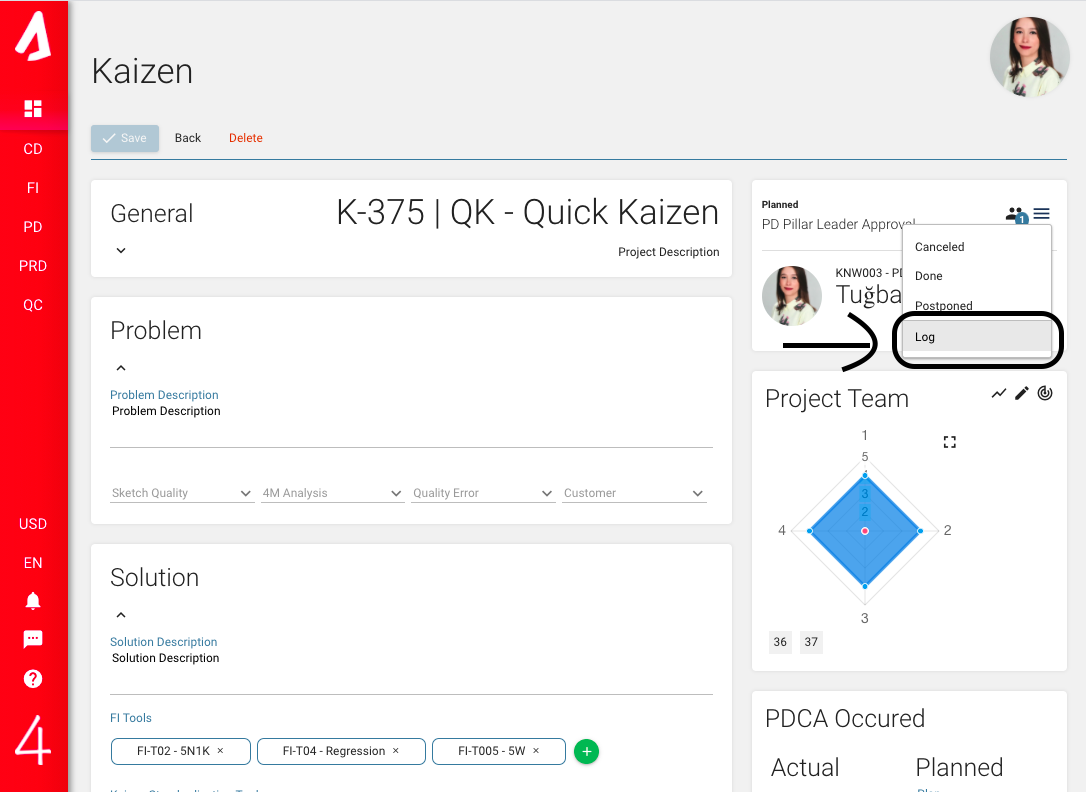
When you press the three line button on the right, you can choose whether the Kaizen / Training / Suggestion is completed, canceled or postponed.
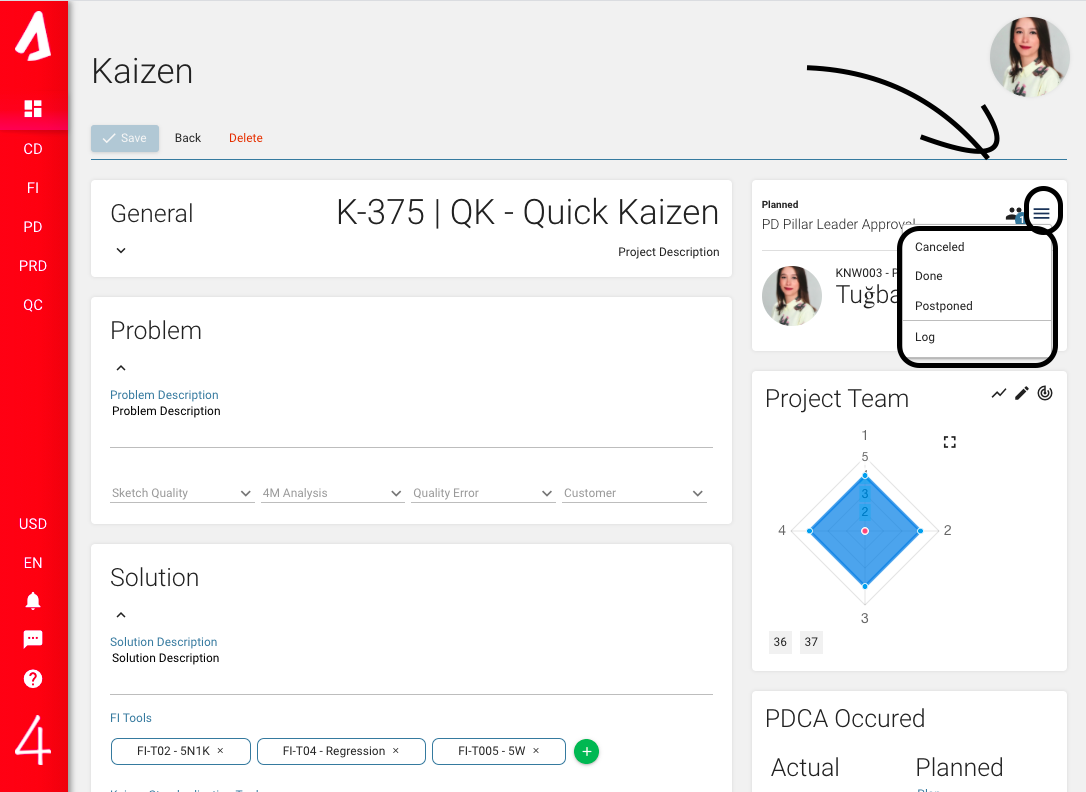
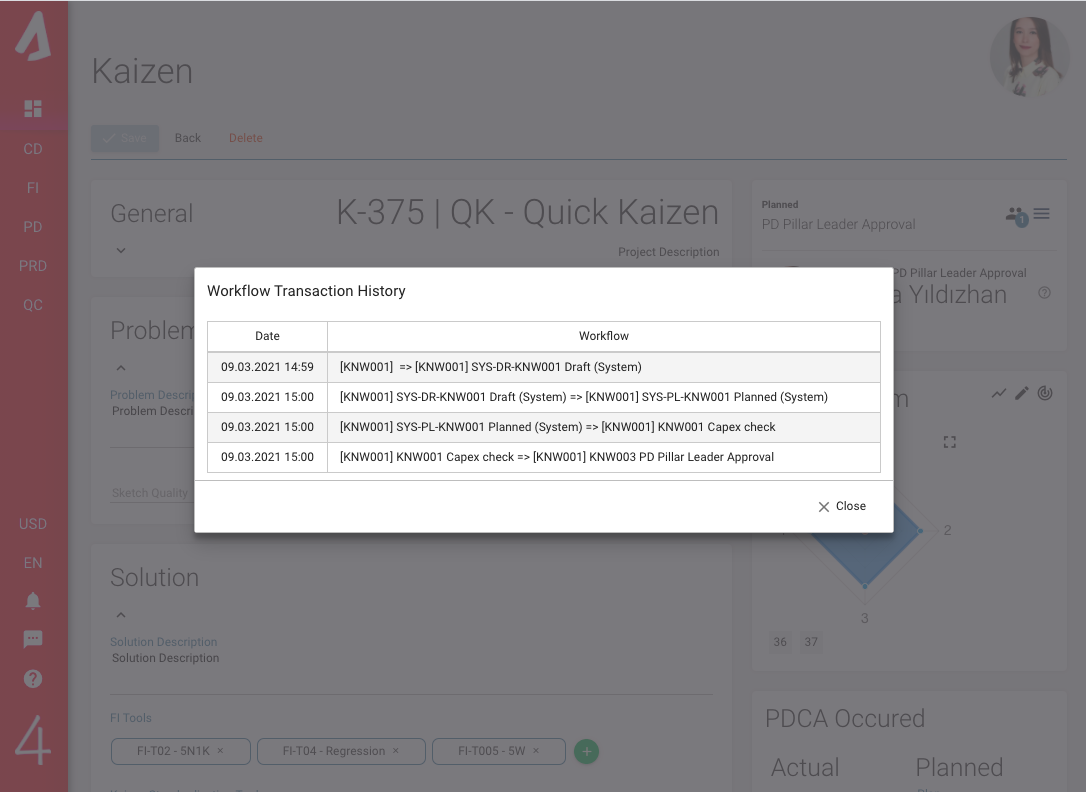
You can see the summary of the workflow by pressing ‘Log’ in this list.
